CGSULIT TS01 433&315MHz Replaceable TPMS Sensor
Product discription:
| 1 98% original Current Vehicle Coverage 2 More Compatible Tools & Sensors 3 Support various car type for reusing 4 Support for matching by autel &CGsulit TPMS80 devices 5 Support replace Metal/Rubber Valves 6 Quicker TPMS Repairs & Service |
315MHz + 433MHz 2 in 1 Universal Programmable TPMS Sensor (Metal Valves/ Rubber Values)
FEATURES:
[315 & 433MHz in 1 Sensor]
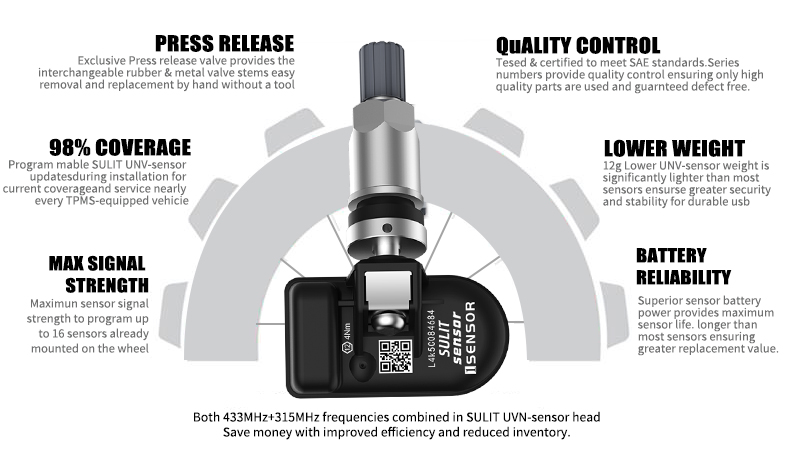
This tire pressure monitoring sensor (for TPMS) has been manufactured to combine both 315 MHz and 433 MHz applications in one sensor to greatly simplify users’ inventory management and lower the investment as well as sales loss. And it is built to perform like OE sensors in terms of signal, durability and functionality.
[Patented Press Release]
With both rubber and metal accessory valve stems available, our accessory valve kits minimize service time and provide a quick assembly for installation. The patented valve release design allows interchangeable rubber and metal valves to be easily replaced in the same sensor head by hand, with no valve fitting tool required.
[Maximum Signal Strength]
The extraordinary sensor signal strength allows CGsulit 1-Sensor to be easily programmed wirelessly even when the sensors have already been mounted to the wheel. CGsulit MX-Sensor/UNV-Sensor is 100% clone-able with an CGsulit latest wireless TPMS programming tool. No relearn is required when the autel MX-Sensor/UNV-Sensor is cloned with the original sensor ID and put in the same position.
[Superior Battery Reliability]
With the highest quality materials and advanced TPMS technology, CGsulit 1-Sensor provides superior battery life and reliability to match OE sensor battery performance. The 1-Sensor body weighs only 13g, making it significantly lighter than most sensors in the market, which ensures better sensor stability and performance.
[Strict Quality Control]
Bullet Points:
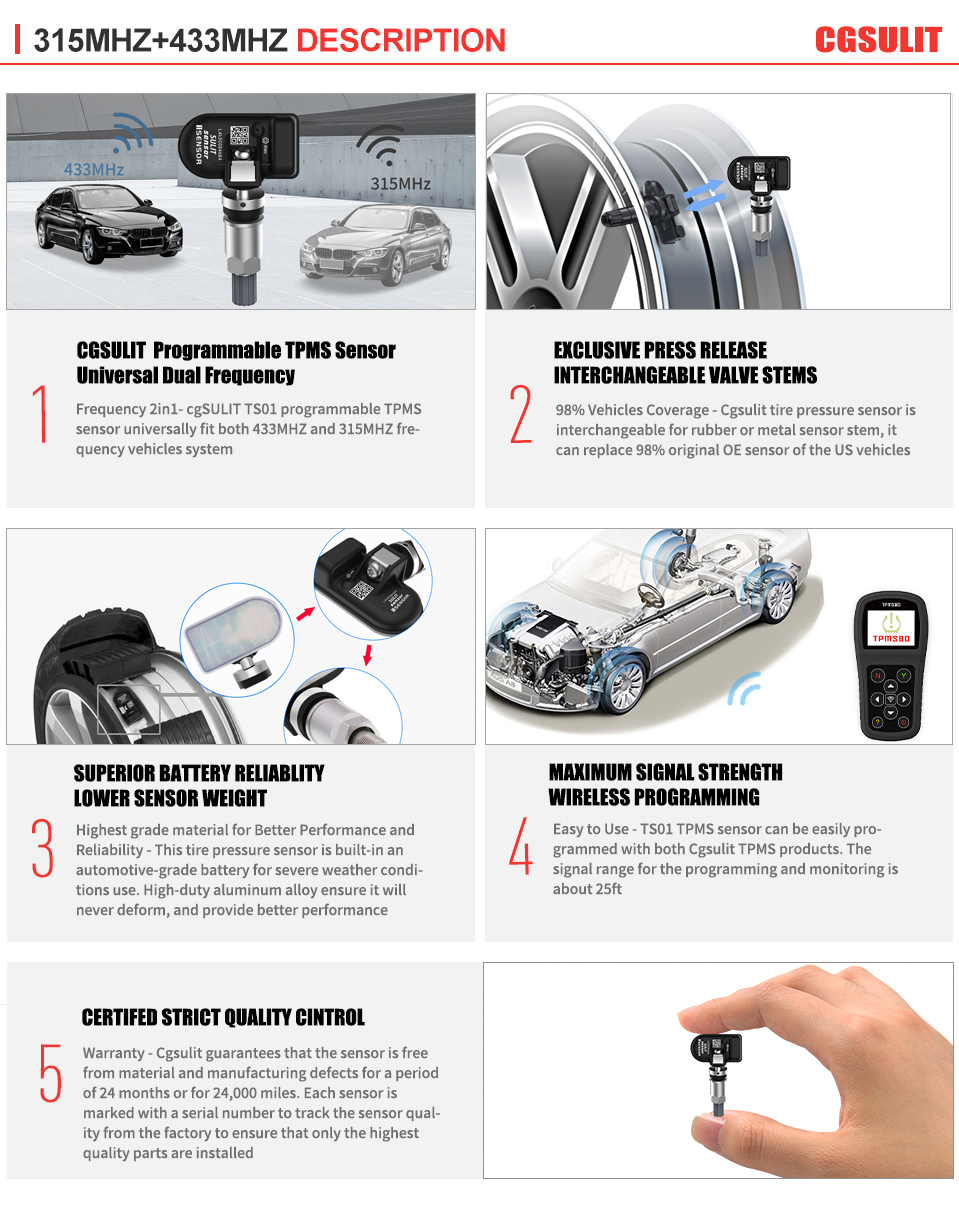
1. Dual Frequency: Only 1 Sensor (315 + 433MHz) to service nearly every TPMS equipped vehicle to lower repair cost and to have higher install efficiency with no relearning required. It is 100% clone-able with the original sensor ID and put in the same position.
2. 98% Vehicle Coverage: Featuring the latest and most comprehensive coverage of 98% OE sensors on the market, and up to 90% of North American, European and Asian vehicles, it nearly fits all types of wheels on the road.
3. Superior Design: The unique PRESS release valve design makes the manual sensor replacement much easier. Also it allows easy stem removal from sensor head, and easily programmed wirelessly even when they have already been mounted to the wheel.
4. Easy to Use: The maximum sensor signal strength allows sensors to be easily programmed wirelessly even when they have already been mounted to the wheel. Moreover, the unique PRESS release valve design makes the manual sensor replacement much easier.
Installation Guide
IMPORTANT: Before operating or maintaining this unit, please read these instructions carefully and pay extra attention to the safety warnings and precautions. Useing this unit correctly and with care. Failure to do that may cause damage and/or personal injury and will void the warranty.
1. Loosening The Tire
Remove the valve cap and core and deflate the tire.
Use the bead loosener to unseat the tire bead.
CAUTION: The bead loosener must be facing the valve.
2. Dismounting the Tire
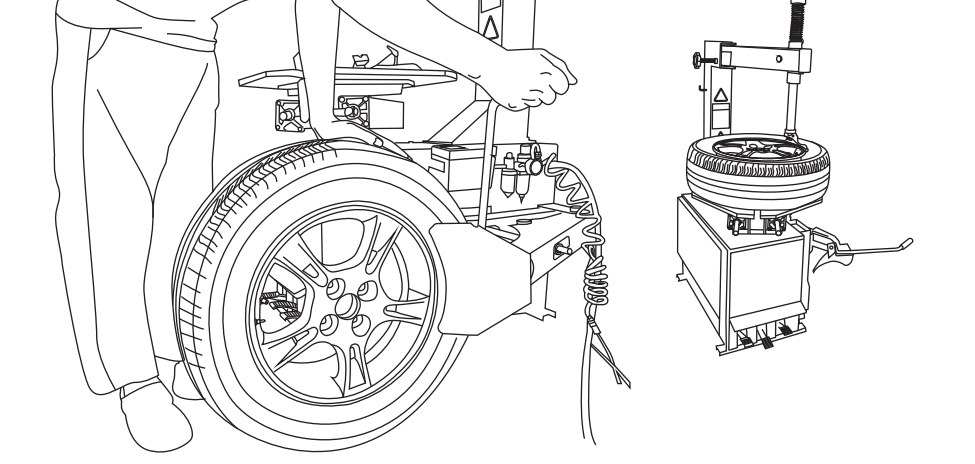
Clamp the tire onto the tire changer, and adjust the valve at 1 o'clock relative to the tire separation head. Insert the tire tool and lift the tire bead onto the mounting head to dismount the bead.
CAUTION: This starting position must be observed during the whole dismounting process.
3. Dismounting the Sensor
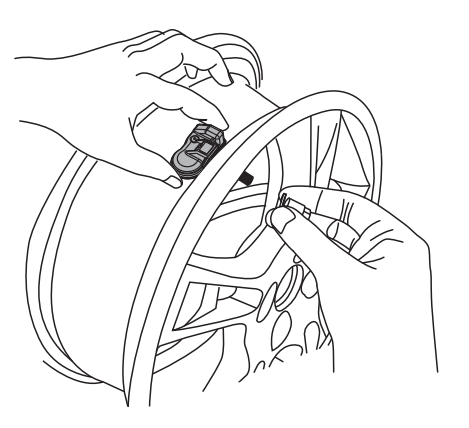
Remove the screw nut from the valve stem, and then remove the sensor assembly from the rim
4. Mounting Sensor and Valve
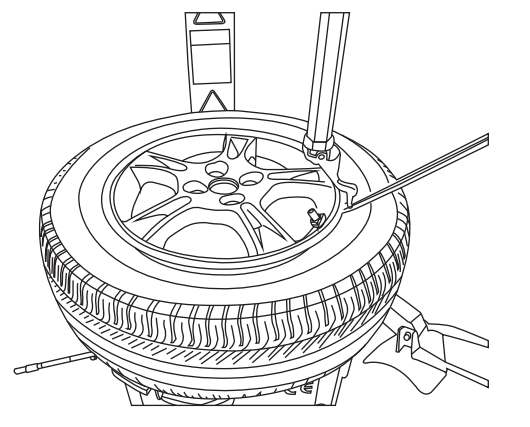
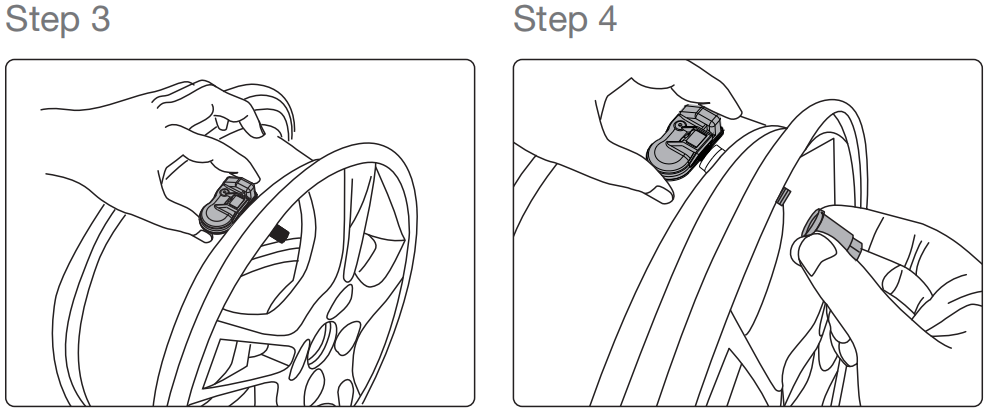
Step1. Connect the sensor body and valve stem at a suitable angle(Normally use the maximum angle of 30") and tighten the screw.
Step2. Remove the screw nut from the valve stem.
Step3. Slide the valve stem through the valve hole of the rim with the sensor on the inside of the rim.
Step4. Assemble the screw nut back on the valve stem with 4.0 Nm power, then tighten the cap
CAUTION:30° is suitable for most rims. If the angle does not match the rim while installing in step 3, please loosen the screw then re-operate from step 1.
5. Mounting the Tire
Place The Tire on The Rim, make sure that the valve faces the separation head at an angle of 180 o. Mount the tire over the rim. 5 Mounting the tire
CAUTION: The tire should be mounted to the wheel using tire changer manufacturer's instructions
Note:
1. The TPMS sensor assemblies are replacement or maintenance parts for vehicles that have a factory installed TPMS.
2. Make sure to program the sensor by cgsulit sensor programming tools for your specific vehicle make, model and year before installation.
3. Do not install programmed TPMS sensor in damaged wheels.
4. In order to guarantee optimal function, the sensor may only be installed with original valves and accessories provided by CGsulit.
5. Upon completion of installation, test the vehicle TPMS systems using procedures described in the original manufacturer' s user guide
to confirm proper installation.
6. Each time a tire is serviced or dismounted, or if the sensor is removed or replaced, it is mandatory
to replace the rubber grommet, washer, nut and valve core with our parts to ensure proper sealing. It is mandatory to replace the sensor if it is extremely damaged.
CGSULIT UNV-Sensor TS01 Specifications:
Battery Life: ≥5 years
Operating Temperature: -40°C to +125°C
Storage Temperature: -40°C to +150°C
Operating Humidity: 90%
Operating Frequency: 433 MHz/315MHz
Pressure Monitoring Range: 100 to 900 kPa
Pressure Reading Accuracy: ±10 kPa
Temperature Reading Range: -40°C to +125°C
Temperature Reading Accuracy: ±5°C
G Sensor Reading Accuracy: ±15%
Transmission Power: 5-8 dBm
Battery: 3.0 V
Dimensions (W x H x D): 55.1 mm x 29.4 mm x 21.8 mm (Clamp-in Sensor)
Weight (Without Valve): 18.5 g (Clamp-in Sensor)


